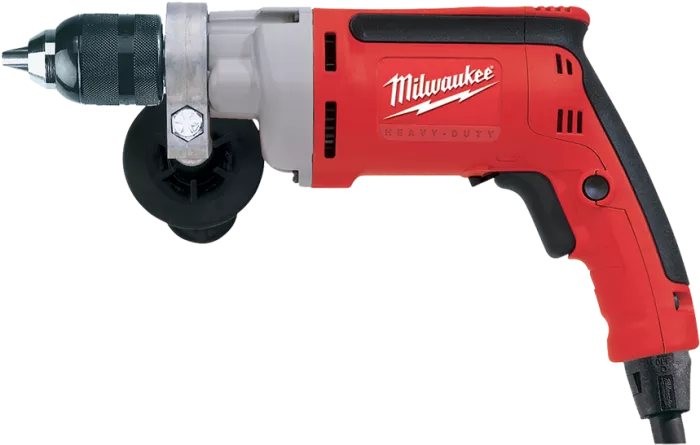
The power drill is an indispensable DIY tool, boasting speed and torque that enable it to bore holes, tighten fasteners, and even mix paint. Its convenience and accuracy are unmatched, making it a favorite among DIY enthusiasts. However, due to its considerable power, new DIYers may feel hesitant to use it. Once you learn how to operate a drill and experience the time it can save, you’ll likely wonder how you ever managed without it.
This guide will cover the differences between types of drills, how to use a power drill effectively, and essential safety tips.
Important Drill Parts
Before using a power drill, it’s crucial to familiarize yourself with its various components. Like most power tools, drills consist of several key parts:
Chuck
The chuck is the part of the drill that firmly clamps down on the drill bit or driver bit. Most modern drills feature keyless chucks, which are easy to use. However, older drills often require a special wrench to open and close the chuck.
Trigger
The trigger serves as the on – off switch and is used to activate the drill’s motor. Most drills have pressure – sensitive triggers. Light pressure activates a slow speed, while applying more pressure increases the speed.
Motor
Located at the top of most drills, the motor is responsible for spinning the chuck and bits. It provides the power needed to perform various drilling and driving tasks.
Grip
The grip is the area where you hold the drill. It is often covered with rubber to provide an anti – slip surface and enhance comfort during use.
Torque Adjustment
The torque adjustment ring is located at the base of the chuck. It allows you to select the amount of torque the drill will exert. Inside the drill, there is a clutch that slips at the predetermined value to prevent over – torquing, which could damage the material or the drill itself.
Reverse Switch
Drills can spin in both clockwise and counterclockwise directions. The reverse switch enables you to select the desired direction. This is useful when removing screws or backing out a bit.
Cord or Battery
The cord or battery is the power source for the drill. Cords plug into wall outlets or extension cords, providing a continuous power supply. Batteries, on the other hand, charge on a charging station and then snap onto the drill to power it.
3 Types of Drill/Drivers to Know
Power drills have a long history, with the first power drill patent dating back over 130 years. Over time, drill designs have evolved significantly, and today’s models come in three main varieties.
Corded Drills
Corded drills are known for their consistent power supply. They are ideal for heavy – duty tasks that require continuous power, such as drilling large holes in thick materials or driving long screws. However, they are limited by the length of the cord and require access to an electrical outlet.
Cordless Drills
Cordless drills offer greater portability, allowing you to work in areas without easy access to an electrical outlet. They are powered by rechargeable batteries, which come in various capacities. Higher – capacity batteries provide longer runtime but may take longer to charge. Cordless drills are suitable for a wide range of tasks, from light – duty drilling to medium – duty driving.
Hammer Drills
Hammer drills are designed for drilling into hard materials such as concrete, brick, and stone. They combine the spinning action of a regular drill with a hammering motion, which helps to break through tough materials. Hammer drills are essential for construction and renovation projects that involve drilling into masonry.
Drill Safety Tips
Using a drill safely is of utmost importance to prevent accidents and injuries. Here are some essential safety tips to keep in mind:
Secure the Drill
Drills can generate a significant amount of torque. If the bit binds in a board or surface, the handle may try to “jump” out of your hand. This can cause wrist injuries, and in the case of heavy – duty right – angle drills, it can even break bones. To prevent this, always hold the drill securely during operation.
Check for Hidden Wires and Pipes
When drilling into a wall, it’s crucial to be aware of the potential presence of electrical wires and plumbing pipes hidden behind the drywall. Use a stud finder to help locate these hidden elements before you start drilling. This will help you avoid damaging them and prevent potential electrical hazards or water leaks.
By understanding the different parts of a drill, the various types available, and following these safety tips, you’ll be well – equipped to use a power drill safely and effectively for your DIY projects.

