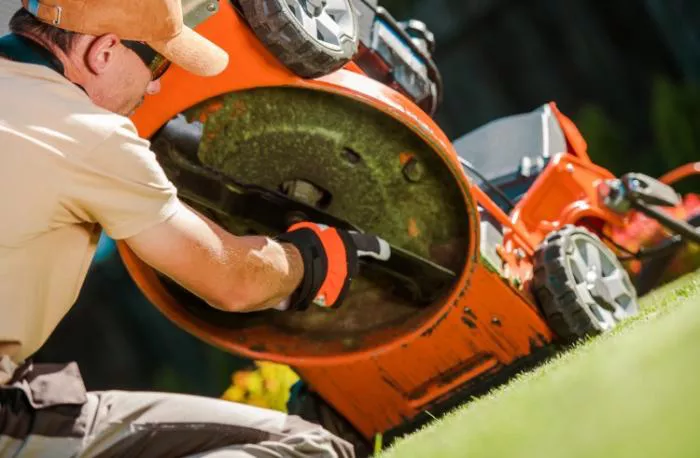
A sharp lawn mower blade is essential for a healthy lawn. Dull blades tear grass instead of cutting it cleanly, leaving ragged edges that turn brown and weaken the turf. This can lead to disease, pest infestations, and an uneven appearance. Sharpening your mower blades at home is a simple, cost-effective way to maintain a pristine lawn while extending the life of your equipment. This guide will walk you through the entire process step by step, from safety precautions to proper sharpening techniques and reinstallation.
Why Sharpening Your Lawn Mower Blades Matters
A dull blade damages grass. Instead of a clean cut, it shreds the blades, leaving them vulnerable to pests and disease. A sharp blade promotes faster healing and a greener lawn. Regular sharpening also reduces strain on your mower’s engine, improving fuel efficiency and extending its lifespan.
Sharpening your own blades is cost-effective. Professional sharpening services charge per blade, and the costs add up over time. With basic tools and a little practice, you can maintain sharp blades yourself.
Safety Precautions Before Starting
Working with lawn mower blades requires caution. Always disconnect the spark plug before handling the blade. This prevents accidental starts. Wear thick gloves to protect your hands from sharp edges. Use safety glasses to shield your eyes from metal filings.
Secure the mower properly. If you’re working with a riding mower, lift it safely with jack stands. For push mowers, tip them carefully to access the blade. Never work on an unstable surface.
Tools You Will Need
Gather the right tools before starting. You will need:
- A wrench or socket set to remove the blade
- A bench vise or clamp to hold the blade steady
- A metal file or angle grinder for sharpening
- A balancing tool (optional but recommended)
- A wire brush for cleaning
- A rag for wiping debris
Removing the Lawn Mower Blade
First, disconnect the spark plug. This is a critical safety step. Tilt the mower on its side with the air filter facing up. This prevents oil leaks into the engine.
Locate the blade bolt. Use the wrench or socket set to loosen it. Some bolts may be tight due to rust or debris. Applying penetrating oil can help loosen stubborn bolts.
Once the bolt is removed, take out the blade. Note its orientation before removing it. Installing it backward can damage your mower.
Cleaning the Blade
Before sharpening, clean the blade thoroughly. Use a wire brush to remove grass clippings, dirt, and rust. A clean blade is easier to sharpen and inspect for damage.
Check for cracks or excessive wear. If the blade is bent or badly damaged, replacement may be necessary. Minor nicks can be fixed during sharpening.
Sharpening the Blade
There are two common methods for sharpening: using a file or an angle grinder.
Using a File
Secure the blade in a bench vise. Position it so the cutting edge faces upward. Follow the original angle of the blade, usually between 30 and 45 degrees.
Use smooth, even strokes with the file. Move from the base of the blade toward the tip. Maintain consistent pressure to ensure an even edge. Avoid over-filing, as this can weaken the blade.
After several strokes, check the edge. It should feel sharp to the touch. Repeat the process on the other side of the blade.
Using an Angle Grinder
An angle grinder speeds up the process but requires caution. Wear heavy-duty gloves and eye protection.
Clamp the blade securely. Turn on the grinder and gently run it along the cutting edge. Keep the grinder moving to avoid overheating the metal. Overheating can weaken the blade.
Work in short bursts to maintain control. Check the edge frequently to ensure even sharpening.
Balancing the Blade
An unbalanced blade causes vibration, which can damage your mower. After sharpening, check the balance.
Hang the blade on a nail or use a balancing tool. If one side dips lower, file a small amount of metal from the heavier side. Repeat until the blade hangs level.
Reinstalling the Blade
Once sharpened and balanced, reinstall the blade. Align it in the original position. Tighten the bolt securely. A loose blade can come off during operation, causing damage or injury.
Reconnect the spark plug. Start the mower and listen for unusual vibrations. If everything sounds smooth, your sharpening job is successful.
How Often to Sharpen Your Blades
Sharpen your blades at least once per mowing season. If you mow frequently or hit rocks and debris, check the blades more often. Dull blades require more frequent sharpening.
Signs Your Blade Needs Sharpening
- Grass appears ragged after mowing
- The mower struggles to cut thick grass
- Uneven cutting patterns
- Increased fuel consumption
Additional Tips for Maintaining Sharp Blades
Avoid mowing over rocks or hard objects. These can chip or dull the blade quickly. Clean the underside of your mower regularly to prevent grass buildup. Store your mower in a dry place to reduce rust.
Conclusion
Sharpening your lawn mower blades is a simple but important task. A sharp blade keeps your lawn healthy and your mower running efficiently. With the right tools and safety precautions, you can do it yourself in less than an hour. Regular maintenance ensures a clean cut and a beautiful lawn all season long. By following these steps, you’ll save money and enjoy a better-looking yard. Take the time to sharpen your blades properly, and your lawn will thank you.
Related topics:
- 3 BEST REEL LAWN MOWER WITH BAGGER
- HOW MUCH IS A USED PUSH LAWN MOWER WORTH?
- ARE LAWNMOWER BLADES UNIVERSAL?

