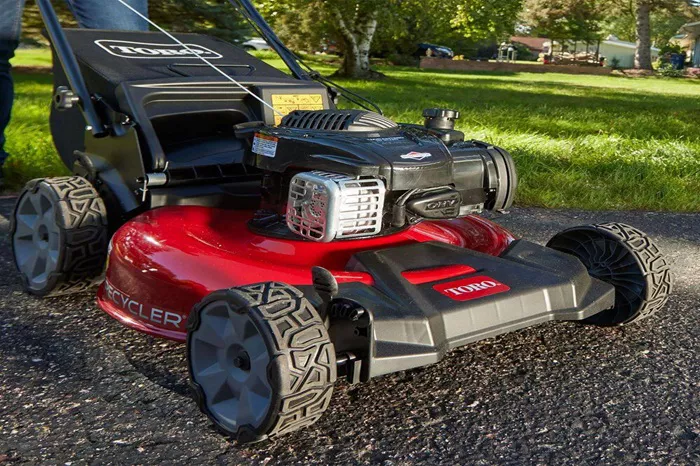
A self-propelled Toro lawn mower is a convenient tool that saves time and effort. But like all machines, it can run into problems. Whether your mower isn’t moving forward or you hear strange noises from the wheels, you might be dealing with common issues that are fixable at home. This article will guide you through diagnosing and repairing your Toro mower, using simple steps and tool-based expertise.
Common Issues
Drive Belt Problems
The drive belt connects the engine to the transmission, which powers the wheels. Over time, belts can wear out, stretch, or even break. When this happens, your mower may start fine but won’t move forward. If the belt is worn, you might notice it slipping or hear squealing sounds.
Signs of a worn or broken drive belt:
Mower won’t move but engine runs
Squeaking or squealing noise when engaging the drive
Loose or visibly cracked belt
Cable Adjustments
The drive cable links the control lever to the transmission. If the cable becomes loose or damaged, the mower may not engage the self-propel function properly. Sometimes, the cable just needs adjusting. Other times, it may need replacing.
Symptoms of cable issues:
Lever feels loose or unresponsive
Mower moves slowly or only intermittently
Wheel Gears
The front or rear wheels (depending on your Toro model) contain small gears that work with the transmission. Grass and debris can clog these gears, or they can wear down with use.
Watch for these signs:
Clicking sounds when pushing the mower
Difficulty moving the mower forward
Uneven wheel movement
Transmission Issues
If the belt and cable are in good shape but the mower still won’t move, the transmission might be the problem. Internal gears may wear out, especially if the mower is used frequently.
Clues pointing to transmission failure:
Complete loss of self-propel movement
Grinding noise from the transmission area
No response when engaging the drive lever
Troubleshooting Steps
Before replacing parts, it’s important to figure out what’s wrong. Here’s a step-by-step guide to help you diagnose the problem.
Turn off the mower and disconnect the spark plug. This prevents accidental starting.
Tilt the mower safely to inspect underneath. Drain the gas or tilt with the carburetor facing up.
Inspect the drive belt. Look for cracks, wear, or breaks.
Check the drive cable. Squeeze the control lever and watch the cable move. If it doesn’t pull tight, it may need adjustment or replacement.
Examine the wheels. Remove them to inspect gears for grass buildup or wear.
Test the transmission. Rotate the drive wheels manually with the mower off. If they spin freely without resistance, the transmission might be faulty.
Repair Instructions
Replacing the Drive Belt
Tools needed: Socket wrench, screwdriver, new belt
Disconnect the spark plug.
Remove the mower deck cover to access the belt.
Take out the old belt by removing the drive pulley guard and pulling the belt off.
Install the new belt, routing it through the same path.
Replace the cover and reconnect the spark plug.
Adjusting the Drive Cable
Tools needed: Pliers, wrench
Locate the cable adjustment nut near the handle or transmission.
Loosen the nut and pull the cable tight.
Retighten the nut.
Test the lever. It should feel tight and responsive.
Cleaning or Replacing Wheel Gears
Tools needed: Screwdriver, wire brush, replacement gears (if needed)
Remove the wheel by unscrewing the center bolt.
Inspect the gear teeth for wear.
Use a wire brush to clean out grass or debris.
If the gears are worn or broken, replace them.
Reattach the wheel securely.
Cleaning Clogged Components
Grass and dirt can clog the drive system. After removing covers, use compressed air or a brush to clean the area around the belt, transmission, and wheel gears. Be sure everything spins freely before reassembly.
Tools Needed
- Socket wrench set
- Screwdrivers (flat and Phillips)
- Needle nose pliers
- Wire brush
- Replacement drive belt
- Replacement cable or wheel gears (if needed)
- Gloves and safety glasses
Safety Precautions
Always disconnect the spark plug before working on the mower.
Wear gloves and eye protection.
Keep the mower on a stable surface.
Drain the fuel or tilt the mower away from the carburetor.
Use proper lifting techniques when handling heavy parts.
Maintenance Tips
Clean your mower after each use to remove grass buildup.
Check the drive belt and cable for signs of wear every few weeks.
Lubricate wheel axles and inspect the transmission regularly.
Store your mower in a dry place to avoid rust.
Replace worn parts as soon as you notice a problem.
When to Seek Professional Help
If you’ve checked the belt, cable, wheels, and transmission but your Toro mower still won’t move, it may be time to consult a professional. Transmission replacement and internal gear repairs often require specialized tools and knowledge. If you’re not confident in your repair skills, taking the mower to a certified technician is the safest option.
Conclusion
Fixing a self-propelled Toro lawn mower can be straightforward if you follow the right steps. Most problems are related to the drive belt, cable, or wheel gears, and these can be repaired with basic tools. Regular maintenance helps avoid costly issues, but don’t hesitate to seek help for more serious problems. By staying on top of inspections and cleaning, you’ll keep your Toro mower running smoothly all season long.
Related topics:
- Who Manufactures Ferrex Lawn Mowers
- Who Made Scotts Lawn Mowers
- Why Does My Lawn Mower Start Then Stop?

