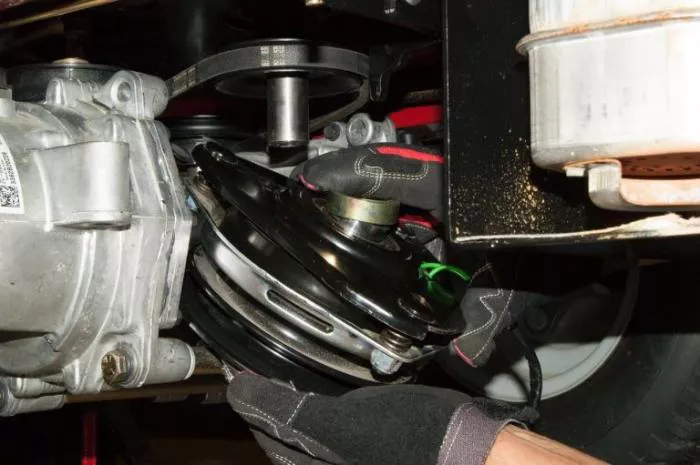
Electric clutches are essential components in many modern lawn mowers, allowing operators to engage and disengage the cutting blades with ease. When an electric clutch fails, it can disrupt the mower’s performance, leading to inefficient operation or complete blade disengagement. Repairing an electric clutch requires a systematic approach, combining diagnostic skills with mechanical know-how. This guide provides a detailed, step-by-step process to help you restore your lawn mower’s electric clutch to proper working condition.
Understanding the Electric Clutch
Before attempting repairs, it’s important to understand how an electric clutch functions. The electric clutch is an electromagnetic device that connects the engine’s power to the mower blades when engaged. When electricity flows through the clutch coil, it creates a magnetic field that pulls a friction disc against a drive plate, transferring rotational force to the blades. If the clutch fails, the blades may not spin, or they may engage inconsistently.
Common issues with electric clutches include worn friction discs, damaged wiring, faulty coils, or misaligned components. Identifying the root cause is the first step in effective repair.
Tools and Safety Precautions
Working on a lawn mower’s electric clutch requires specific tools and safety measures. Ensure you have the following tools before starting:
A multimeter for electrical testing
Wrenches and sockets for disassembly
A pry bar or clutch removal tool
A clean workspace with adequate lighting
Safety precautions are critical: Always disconnect the battery or spark plug before working on the mower. Wear gloves and safety glasses to protect against sharp edges and debris. Work on a stable surface to prevent accidents.
Diagnosing the Problem
Before disassembling the clutch, perform a thorough diagnosis to pinpoint the issue.
Check the electrical connections: Loose or corroded wires can prevent the clutch from receiving power. Inspect the wiring harness and connectors for damage.
Test the clutch coil: Use a multimeter to measure resistance across the clutch terminals. A reading outside the manufacturer’s specified range indicates a faulty coil.
Inspect the friction disc: If the clutch engages but slips, the friction disc may be worn or contaminated with oil.
Verify the power supply: Ensure the mower’s electrical system delivers the correct voltage to the clutch when engaged.
Removing the Electric Clutch
Once you’ve identified the problem, proceed with removing the clutch for further inspection or replacement.
Disconnect the battery: Prevent accidental starts by removing the negative terminal.
Access the clutch assembly: Depending on the mower model, you may need to remove the mower deck or other components to reach the clutch.
Unbolt the clutch: Use the appropriate socket to loosen the clutch mounting bolts. Some clutches may require a special puller tool for removal.
Detach the wiring: Carefully disconnect the clutch’s electrical connector.
Inspecting and Repairing the Clutch
With the clutch removed, inspect each component for wear or damage.
Examine the friction disc: Look for excessive wear, cracks, or oil contamination. Replace the disc if necessary.
Check the bearing: Spin the clutch pulley by hand. If it feels rough or makes noise, the bearing may need replacement.
Test the coil: If resistance readings were abnormal earlier, replace the coil.
Clean the clutch assembly: Remove dirt, grease, or rust that may interfere with operation.
Reassembling and Testing
After repairs or replacements, reassemble the clutch carefully.
Reinstall the clutch: Align it properly and tighten the bolts to the manufacturer’s torque specifications.
Reconnect the wiring: Ensure the electrical connector is secure.
Reattach the mower deck: If removed, reposition and secure it properly.
Test the clutch: Reconnect the battery and start the mower. Engage the blades to verify smooth operation.
Preventive Maintenance Tips
To extend the life of your electric clutch, follow these maintenance practices:
Keep the clutch clean: Regularly remove grass clippings and debris.
Check wiring periodically: Look for frayed or loose connections.
Lubricate moving parts: Apply grease to bearings as recommended.
Avoid overloading the mower: Excessive strain can damage the clutch.
When to Seek Professional Help
If troubleshooting and repairs do not resolve the issue, consult a professional technician. Complex electrical problems or internal clutch damage may require specialized tools and expertise.
Conclusion
Repairing a lawn mower’s electric clutch is a manageable task with the right knowledge and tools. By following this guide, you can diagnose, repair, and maintain your clutch efficiently, ensuring reliable performance. Regular inspections and proper care will minimize future failures, keeping your mower in top condition for years to come.
This comprehensive approach ensures that even those with basic mechanical skills can successfully restore their mower’s electric clutch, saving time and money on professional repairs.
Related topics:

