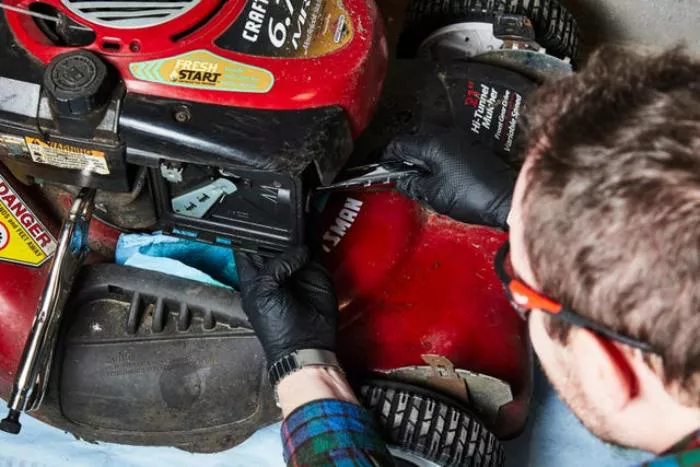
Gas leaks in lawn mowers are a common issue that can lead to poor performance, safety hazards, and environmental concerns. Identifying and fixing the problem promptly is crucial, as even a small leak can cause fuel waste, engine misfires, or even fire risks. This guide provides a step-by-step approach to diagnosing and repairing gas leaks in lawn mowers, ensuring your equipment runs safely and efficiently. Whether the leak comes from a cracked fuel line, loose connection, or damaged carburetor, understanding the proper repair methods will help you maintain your mower in top condition.
Understanding the Causes of Gas Leaks
Gas leaks in lawn mowers can occur for several reasons. Knowing the root cause helps in applying the correct fix.
Worn or Damaged Fuel Lines: Over time, fuel lines can crack or become brittle due to exposure to heat and fuel vapors. This leads to leaks.
Loose or Faulty Fuel Tank Connections: If the fuel tank is not securely fastened or the connections are loose, gasoline can seep out.
Damaged Fuel Filter: A cracked or improperly installed fuel filter can cause leaks.
Faulty Carburetor: The carburetor may develop leaks if its gaskets or seals wear out.
Cracked Fuel Tank: Physical damage or corrosion can cause the fuel tank to develop cracks, leading to leaks.
Safety Precautions Before Repairing
Before attempting any repairs, prioritize safety to prevent accidents.
Work in a Well-Ventilated Area: Gasoline fumes are flammable and hazardous. Always work outdoors or in a space with good airflow.
Disconnect the Spark Plug: This prevents accidental engine starts while working on the mower.
Drain the Fuel Tank: Empty the tank to minimize spillage and reduce fire risks.
Wear Protective Gear: Use gloves and safety glasses to protect against fuel exposure and debris.
Tools and Materials Needed
Gather the necessary tools and materials before starting the repair process.
Basic Tools: Screwdrivers, pliers, and wrenches for disassembling parts.
Replacement Parts: Fuel lines, clamps, gaskets, or a new fuel tank if required.
Fuel-Resistant Sealant: Useful for sealing minor cracks or leaks.
Clean Cloth: For wiping away spilled fuel and cleaning components.
Step-by-Step Guide to Fixing a Gas Leak
Follow these steps to locate and repair the gas leak in your lawn mower.
Inspect the Fuel System
Start by examining the entire fuel system to locate the source of the leak.
Check the Fuel Lines: Look for cracks, splits, or signs of wear. Squeeze the lines gently to see if fuel seeps out.
Examine the Fuel Tank: Inspect for cracks, holes, or loose fittings. Pay attention to the seams and bottom of the tank.
Inspect the Carburetor: Look for wet spots or fuel residue around the carburetor, indicating a leak.
Replace Damaged Fuel Lines
If the fuel lines are the issue, replacing them is straightforward.
Remove the Old Fuel Lines: Use pliers to loosen the clamps and disconnect the lines from the tank and carburetor.
Install New Fuel Lines: Cut the new lines to the correct length and attach them securely with clamps. Ensure a tight fit to prevent future leaks.
Repair or Replace the Fuel Tank
A cracked fuel tank may need repair or replacement.
Small Cracks: Use a fuel-resistant epoxy or sealant to patch minor cracks. Allow it to cure completely before refilling the tank.
Large Cracks or Holes: Replace the fuel tank entirely. Remove the old tank, transfer any necessary components, and install the new one.
Fix Carburetor Leaks
If the carburetor is leaking, inspect its gaskets and seals.
Disassemble the Carburetor: Remove it from the engine and take it apart carefully.
Replace Worn Gaskets: Install new gaskets and seals to ensure a proper seal. Reassemble the carburetor and reinstall it.
Test for Leaks After Repair
Once repairs are complete, test the system to ensure the leak is fixed.
Refill the Fuel Tank: Add a small amount of gasoline and check for leaks.
Run the Engine: Start the mower and let it run for a few minutes. Observe the repaired areas for any signs of leakage.
Preventive Measures to Avoid Future Leaks
Taking preventive steps can help avoid gas leaks in the future.
Regular Maintenance: Inspect fuel lines, tank, and carburetor periodically for wear and tear.
Use High-Quality Parts: Replace components with durable, fuel-resistant materials.
Store Properly: Keep the mower in a dry, shaded area to prevent fuel line degradation.
Avoid Overfilling: Fill the tank only to the recommended level to reduce pressure on the system.
When to Seek Professional Help
If the leak persists after repairs or if you are unsure about the process, consult a professional.
Complex Repairs: Issues like internal engine leaks or severe carburetor damage may require expert attention.
Safety Concerns: If you are uncomfortable working with fuel systems, a professional can ensure the job is done safely.
Conclusion
Fixing a gas leak on a lawn mower involves identifying the source, making necessary repairs, and testing the system. By following this guide, you can address the issue effectively and maintain your mower’s performance. Regular inspections and proper maintenance will help prevent future leaks, ensuring your lawn mower operates safely for years to come.
Remember to always prioritize safety and use the right tools for the job. If in doubt, seek professional assistance to avoid further damage or hazards. With these steps, you can confidently tackle gas leaks and keep your lawn mower running smoothly.
Related topics:
- HOW TO FIX A PRIMER BUTTON ON A LAWN MOWER
- HOW TO REPAIR A PUSH LAWN MOWER
- HOW OFTEN SHOULD I SERVICE MY LAWN MOWER?

